1. Introduction
|
1. Introduction |
ConQuest Online is a collectible piece game in which you battle your opponent over the Internet with an arsenal of ships, weapons, and people from the Star Trek® universe. Just like paper-based collectible card games, ConQuest Online pieces feature beautiful artwork, specific rules, and fascinating statistics. Pieces can be purchased (starter groups and booster packs) and traded. Genetic Anomalies’ unique Collectible Bits™ technology keeps everyone honest and the pieces legal.
Our Internet tournaments allow you to compete with players from all over the world, with rules and piece restrictions handled by the computers. ConQuest Online even tallies wins and losses to track your ranking among thousands of players worldwide.
The object of ConQuest Online is to outmaneuver your opponent in a game of galactic “chess.” You do this by capturing planets that provide you with Control Points. These Control Points allow you to deploy ships, people, and items. You use ships and people to invade your opponents Home Planet or to prevent your opponent from invading yours. Items enhance your ships and people, giving them special abilities or raising their statistics.
Microsoft® Windows® 95, Windows 98, or Windows 2000. ConQuest Online will not work on earlier versions of Windows or Windows NT, so please don’t try it!
800x600 resolution or higher and 16-bit color depth.
Intel® Pentium® 75 MHz processor.
8 MB of RAM.
28.8 Internet connection, either through a dial-up (28.8) line to an Internet Service Provider (ISP) or a direct network connection.
50 MB of uncompressed hard disk space for the game files, plus 20 MB for the Windows swap file.
Quad-speed CD-ROM drive (600 K/sec sustained transfer rate).
100% Microsoft-compatible mouse and driver.
Installing the Game with AutoPlay
If AutoPlay is enabled on your computer, install Star Trek ConQuest Online as follows:
Insert the game CD into your CD-ROM drive.
The splash screen automatically appears.
Click the Install Star Trek ConQuest Online button.
You can use the other options on the splash screen:
Click the Help button to call up the help system.
Click the More button for electronic registration, previews, and extras.
Click the Reinstall Star Trek ConQuest Online button to reinstall the game if it was accidentally deleted from your computer. (If the game was accidentally deleted, the Install Star Trek ConQuest Online button on the splash screen will be grayed out. Use the Reinstall button instead.)
Click the Uninstall Star Trek ConQuest Online button if you wish to remove Star Trek ConQuest Online from your hard drive. (You should use this button and not just try to delete the files yourself.) This option removes all game files except your saved games, screen shots, and personal settings.
You can return to the splash screen any time without affecting your installed game.
Installing the Game without AutoPlay/Enabling AutoPlay
If the Star Trek ConQuest Online splash screen does not appear, try the following:
- Double-click the My Computer icon on your desktop (or right-click the icon and choose the Open option).
- From the View menu, select the Refresh option.
- Double-click the Star Trek ConQuest Online CD icon in the window (or right-click the icon and choose the AutoPlay option).
- When the Star Trek ConQuest Online splash screen appears, click the Install button.
If AutoPlay does not function, check the following:
- Make sure the CD is clean and properly placed in the CD-ROM drive.
- Your CD-ROM driver may not be optimized for use with Windows 95/98/2000. To check this:
- Open the Windows Control Panel (click Start: Settings: Control Panel) and double-click the System icon.
- Click the Performance tab. Any hardware drivers that are not fully optimized for use with Windows 95/98/2000 are listed here with an explanation of the problem and suggestions on how to fix it.
- Windows 95/98/2000 may not be setup to autoplay CDs. To check this:
- Open the Windows Control Panel (click Start: Settings: Control Panel) and double-click the System icon.
- Click the Device Manager tab. Click the plus sign next to CDROM, select your CD-ROM, and click Properties.
- Click the Settings tab. If there is no check mark in the box to the left of Auto Insert Notification, AutoPlay is disabled. To enable it, click the box once. When the check mark appear, click OK and follow the steps above to install the game.
- If AutoPlay still does not work, try one of the following:
- Double-click My Computer, double-click the CD-ROM drive icon, and then double-click on Setup.exe at the root level of the CD; or
- Click Start: Run… and type d:\Setup.exe (substitute your CD-ROM’s drive letter if different from “d:”).
Registering Star Trek ConQuest Online
Thanks for purchasing Star Trek ConQuest Online. The CD Key on the CD case allows you to register the game, which gives you access to ranked play, tournament play, trading, and more. As an added bonus, you also receive an extra piece: Ambassador Spock!
To register:
Make sure you are connected to the Internet.
Launch Star Trek ConQuest Online.
When you see a screen with a list of default characters, choose one (“default Federation,” “default Klingon,” “default Romulan,” “default Borg,” or “default Mixed”). Choose the character you want to register as; you will receive all of the pieces in that character’s starting set, in addition to your random assortment of other pieces. When you’ve made your choice, click the Start Playing button.
When the Main Menu screen appears, click the Get Pieces button on the top of the screen.
Wait a moment as the game connects to the Star Trek ConQuest Online server and downloads the most current sales information.
Find the “Registration” sales item (it contains the Star Trek ConQuest Online logo). Drag that item (and only that item!) into the Shopping Cart row. (There is no charge to register the game.) Make sure that no other items are in your Shopping Cart.
Fill out all the information requested in “Purchaser Information.” You may leave the “Credit Card #” field blank or enter None. In the “Offer Code” field, enter the CD Key number on the Star Trek ConQuest Online’s CD case.
Click the Go To Checkout button (the bright orange button right above the Shopping Cart).
Wait a moment as the game verifies your offer code with the server.
You should now see “Registration 1 $10.00 $10.00” near the top of the screen. Just above the “Purchaser Information” section, you should see “Total: $0.00.” If this is not the case, click the Shop More button. This takes you back to the previous screen, where you can correct any errors and then return to this screen.
Click the Confirm! button (the bright green button next to “Total: $0.00”). When you click this, you are asked to enter your birth date (to comply with the Children’s Online Privacy Protection Act.) Enter it now.
Wait a moment as the game verifies everything and downloads your new pieces.
When the “Transaction Complete” window appears, click OK.
Return to the Main Menu by clicking on the button in the upper-right corner. Go to the My Pieces screen, and open up a group there. At the end of the second row you’ll find your new pieces! (You can also view your new pieces by clicking the Transactions button in the My Pieces screen.)
Q are the most powerful beings in the known universe. They can go anywhere, do anything. Nothing threatens them, and no one can contend with them. Consequently, Q get bored and start looking to the universe for excitement. Usually this isn’t good for the regular inhabitants of the universe; excitement for a Q is danger for everyone else.
Recently, the Q have decided to pit their skills against each other in a game of combat and strategy. They want to find out which Q is the most cunning and brave. The game involves each Q using his or her powers to take control of various people and ships in the known universe, and using them to try and capture or overpower the opponent Q. The Q have limited both their powers and the size of the playing field during the course of the games—just to make things interesting.
You take on the role of one of these Q. You may strive to defeat your opponents using people, ships, and items from the Star Trek universe. You use Jean-Luc Picard, Worf, Ambassador Sarek, and others to assist you in your goals. Defeat your opponents and you may become the Q Marshall, renowned in the Continuum as the most brilliant and cunning Q of them all.
This manual provides you with the basic tools and knowledge necessary to enter the universe of ConQuest Online. It is one of many resources that you have available. We encourage you to frequent the official ConQuest Online website (www.ConQuestonline.com) , where you will find a constantly updated array of information. We also encourage you to read the news in the Main Menu screen each time you log in. You can’t miss it—we won’t let you. It’s good clean fun.
Here is a quick walk-through of all the screens in ConQuest Online.
|
Login Screen |
|
|
|
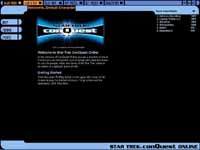
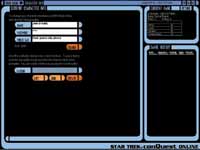
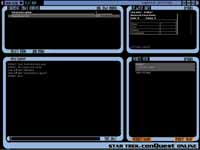
This is the first screen you see after starting ConQuest Online. Select the character you wish to enter the game as by clicking the name in the Character window. Then press the Start Playing button. If you want to create a new character for the game, press the Create New Character button. New characters are unregistered, which means you cannot trade pieces or play ranked games with one until you register the character. See below for more information on registering an account. If you would like to play ConQuest Online without connecting to the Internet, click the Play Offline button. While offline, the only games you can play are against the computer trainer, and you cannot buy items in the Store, enter the Lobby, or edit your Character Info. |
|
|
Once you log in, the Main Menu screen appears. From here you can access all the other screens in the game. At the top of the screen is a menu bar with buttons for all the screen locations in the game. Click on a button to go to its screen. The rankings appear on the right side of the screen: the top ranked players in the game, your current ranking, and the players closest in rank to you. The News area contains current game news such as tournament announcements and results. Many items here have links to further information. |
|
With Group Window
With Piece Window
|
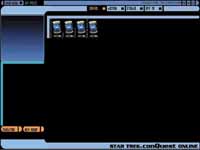
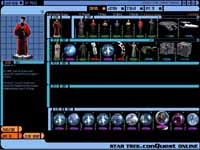
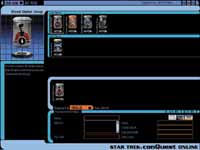
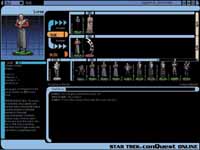
Use this screen to build new Control and Auction Groups and to do things like sending gifts and viewing your trade history. The left side of the screen is a Piece Viewer. Whenever you click a piece on the screen, a large view of the piece appears in the piece viewer, along with the piece’s statistics and information. Buttons beneath the Piece Viewer allow you to create new groups, delete groups, open and close existing groups, and view your trade history. To open or delete a group, select a group (which then appears in the Selected Group window) and then click the appropriate button. The Trade History button lists all trades you’ve made in the game with other players and displays what pieces were involved in the trades. The Group window shows all your existing groups. Whenever you create a new group it appears here. Select a group and press the Open button to see what pieces are in the group. When you open a group or create a new group, the Group window changes to the Piece window, which displays all the pieces in the group and all the other pieces in your collection. A newly created group has no pieces in it. Adding or removing pieces to and from a group is as simple as dragging and dropping the piece you want into or out of the group. Each Control Group must have exactly 40 pieces and one Q piece. (The total count will say 41.) Each Auction Group must have exactly ten pieces. The menu bar is on the top of the screen. Click the Main Menu button there to return to the Main Menu screen. Below the menu bar is another bar with a set of buttons: The Control and Auction buttons allow you to switch between creating Control and Auction Groups. The Storage button opens your Storage Box group where you can put pieces you don’t need in your regular collection. The Give To button allows you to give pieces to other players, even if they are not online at the moment. |
|
Learn to Play Screen |
|
|
|
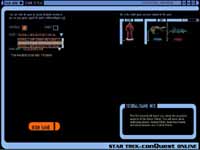
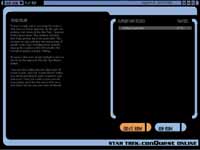
Use this screen to play the game’s tutorials and to play a game against the computer. When you start the game for the very first time, we recommend that you play the tutorials. Click the Tutorials button to enter Tutorial mode.
Click the Games vs. Computer button to enter Games vs. Computer mode.
The menu bar is on the top of the screen. Click the Main Menu button to return to the Main Menu screen. |
|
Character Info Screen |
|
|
|
Use this screen to change your Character information such as your Character name or password. You can also use this screen to join player-created factions. The right of the screen displays your Character’s match history. This shows all the games you have played, who you played, and the game’s result (win, loss, or tie). The bottom half of the screen shows any trophies you have won. You can gain trophies by winning official tournaments. These trophies show up in your Character Info when in the Chat Room, so other players can see how great a player you are! The top half of the screen shows your Character information. You can change your info by entering text in the name or password sections and then clicking the Change button. You can join, leave, or create a player-run faction by clicking the Join, Create, or Leave buttons. If you are joining a faction, enter the name of the faction you wish to join when prompted. The faction will either automatically allow you to join or will consider your application and let you know later if you can get in. Press the Create button to go to a Web page where you can apply to form a new faction. Genetic Anomalies will then consider your application and let you know if your faction is acceptable. There are certain requirements to form a faction, and these requirements are listed on the Web page. At the top of the screen is the menu bar. Click the Main Menu button to return to the Main Menu screen. |
|
Get Pieces Screen |
|
|
|
Use this screen to buy more pieces to add to your ConQuest Online collection. You must have a credit card to purchase anything from this screen. The rows on the right side of the screen contain items that you can purchase. When you click on an item, its description appears in the Piece Viewer on the left. Each item is different; some contain random pieces, some are “starter groups” that give you a preconstructed group ready for immediate play. Be sure to read the description of an item before you purchase it to be sure it’s what you want. To purchase an item, first drag it into your Purchase row. Then fill out all the information fields beneath the Purchase row. When you are ready to purchase all the items in your Purchase row and you have filled in all the information fields, click the Purchase button. Your credit card is then verified, and the items you have bought are added to your collection. Go to the My Pieces screen to view your purchases! Use the Save Info button to save all the information you’ve entered (such as your credit card number and your name and address) on our server, so that you do not have to retype it the next time you wish to purchase something. At the top of the screen is the menu bar. Click the Main Menu button to return to the Main Menu screen. |
|
Select Game Lobby Screen |
|
|
|
This screen appears when you press the Play Now button on the Main Menu. Use this screen to pick which game lobby on our servers you wish to enter to find opponents. The right side of the screen lists all current game lobbies available for you to enter. Next to the lobby’s name are two numbers: the first is the number of people currently in the lobby and the second is the number of people in the lobby including those off playing games. To enter a lobby, select it in the list and press the Join button. This brings you to the Game Lobby screen, where you can challenge other players to games or trade sessions. You can create your own lobby by pressing the Create button. You are then asked to enter a name for your lobby and if you wish to password your lobby. If you password your lobby, only those players who know the password can get in. Once you create the lobby, you enter the Game Lobby screen in your newly created lobby. At the top of the screen is the menu bar. Click the Main Menu button to return to the Main Menu screen. |
|
|
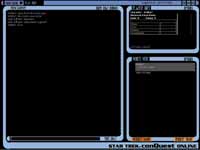
Go to this screen to play game with live opponents, to trade pieces with other players, or just to hang and chat. You’ll spend more time on this screen than anywhere else (except maybe the Game screen!), so you should become familiar with how it works. On the bottom right of the screen is the Who’s Here window, which lists all players in the lobby. Click a player to view his or her information in the Player Info window. You can see how many games the player has played, how many games the player has won, lost or tied, and the player’s current rank in our global ranking system. Most importantly, you can see how many times the player has won or lost against you. It might be wise to not play someone who’s handed you your keester too many times to count! The Chat window is on the bottom left of the screen. You can chat with the other players in the lobby: enter your text in the entry field below the Chat window. Challenge other players to play, ask people if they have pieces to trade, find out people’s opinions of Internet stocks. It’s up to you what to do while you hang out in the lobby; use the power wisely! When you want to challenge someone to a game or start a trading session, click the player’s name in the Who’s Here window and then press the Request Game or Request Trade button. If the other person accepts your request, both of you move on to the Game Settings screen (if you requested a game) or the Trade screen (if you requested a trade). On the top left of the screen is the Lobby window, which lists all available game lobbies and how many players are in each lobby. You can switch to a different lobby by selecting a lobby’s name and clicking the Join Lobby button. You can also create a new lobby by pressing the Create Lobby button. At the top of the screen is the menu bar. Click the Main Menu button to return to the Main Menu screen. |
|
|
When you and another player in the Game Lobby screen agree to a trading session, you both go to the Trade screen. Here, you can trade pieces with the other player to increase the size or quality of your collection. In the middle of the screen is a row containing your play groups. To see the pieces in a group, double-click it. Switch between Control and Auction Groups by clicking the Control/Auction button. Above the group row are two Trade rows. The top row displays pieces the other player puts up as trade offers. Drag your pieces you wish to trade to the bottom row. Use the Chat window to talk with the other player and come to a trade agreement. When you and the other player are satisfied with the terms of the trade, both of you must press the Trade button. You are then asked to confirm the trade, which you do by clicking the Confirm button. When both of you have confirmed, the trade takes place and the pieces exchange hands. Once the exchange is made the trade is irreversible, so make sure the trade is acceptable to you. A Piece Viewer is on the left of the screen. Whenever you click a piece in your own or the other player’s collection, the viewer displays the piece’s stats and info. At the top of the screen is the menu bar. Click the Leave button to end your trade session and return to the Game Lobby screen. |
|
|
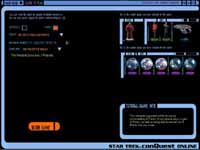
When you and another player in the Game Lobby screen agree to play a game, both of you go to the Game Settings screen. You use this screen to set up the game you are about to play. At the top of the screen are two rows containing all your Control and Auction Groups. Before you can start a game, you must pick which groups you will use in the game. Pick a group by opening it: double-click on the group you wish to use. If you are going to play an Advanced Game you must open both a Control Group and an Auction Group. The player who made the original challenge (the challenging player) makes the following settings on this screen, while the other player (the challengee) gets to agree to the settings:
Once the settings are made, the challenging player must click the Begin Game button, while the challengee player must click the I Agree to These Settings button. Once both players have clicked their buttons, the game begins! |
|
Game Screen |
|
|
|
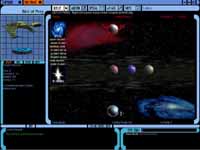
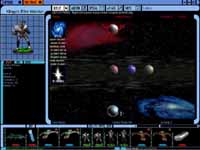
Once you start a game (either with a live opponent or against the computer) you ultimately end up on the Game screen. This is where all the action happens! The large Game Map window displays the game map on which you and your opponent place game pieces. The map has various levels of viewing, from Planet view all the way up to System view. Clicking on the map navigates the various levels. You can also jump directly to a location by clicking its name in the list of map locations on the left of the Game Map window. Your opponent’s Control Points and Q Points are displayed at the top of the screen, and your own Control Points and Q Points appear at the bottom of the screen. These numbers are always visible to both players. The Piece Viewer is on the left of the Game Map window. Like all the Piece Viewers in ConQuest Online, whenever you click on a piece (in the Game Map or in your Control Group) a large picture of it together with its statistics and information appears in the viewer. The Game Reports window is below the Piece Viewer. Throughout the game this window displays text about important events that happen in the game. The Chat Sector is to the right of the Game Reports window. Use it to chat with your opponent. Be polite! Between the Chat Sector and the Game Reports window is the Expand Control Group button. Click it to open the Control Group window, which displays all your Control Group pieces. You can scroll through your Control Group, examining your pieces and plotting strategy. Click the Collapse Control Group button to close the window. The Phase Indicator bar is directly above the Game Map window. The bar lists all the phases; the current phase is backlit. The Game Menu bar is above the Phase Indicator bar. All the important buttons needed for playing the game are here, such as End Phase and Options. |
|
Options Screen |
|
|
|
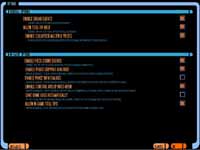
You can reach this screen by pressing the ESC key from anywhere in the game (or by clicking the X button in the menu bar and then clicking the Options button). Use this screen to turn various options on or off, allowing you to customize your ConQuest Online experience. All options are listed on the left of the screen. You turn an option on or off by clicking the box on the right of the option. A lit box means the option is on. You can reset all options to their default settings by clicking the Default button. When you are done setting or changing your options, click the OK button to accept the changes and leave the screen. Clicking the Cancel button to leave the screen without accepting any changes you made. |
Go to:
Top of this page
Help System Home Page
Next chapter:
2. Pieces